Cement art, also known as concrete art, involves using cement as the primary medium to create sculptures, decorative objects, and even functional items. It offers a unique and contemporary approach to art, with the rugged texture and durability of cement adding an industrial and raw aesthetic to the creations. If you’re interested in getting your hands dirty with cement art, here are some steps to help you get started:
1. Gather your materials: To create cement art, you’ll need the following supplies:
– Cement mix: You can find cement mixes specifically designed for art projects at craft stores or hardware stores.
– Water: You’ll need water to mix with the cement powder.
– Reinforcement: Depending on the size and complexity of your project, you may need reinforcement materials such as wire mesh, rebar, or fiberglass.
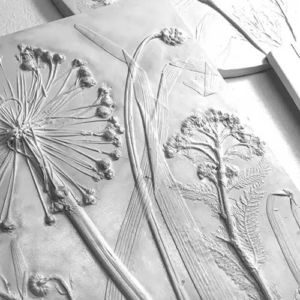
– Moulds: Choose or create moulds to shape your cement. You can use silicone moulds, plastic containers, or build custom moulds from wood, foam, or other materials.
– Tools: Prepare tools such as a mixing container, trowels, spatulas, wire cutters, and sandpaper.
2. Prepare your workspace: Cement art can be messy, so it’s essential to set up your workspace accordingly. Cover the area with plastic sheets or old newspapers to protect surfaces.
3. Mix the cement: Follow the instructions on the cement mix packaging to create the right consistency. Generally, you’ll mix the cement powder with water until you achieve a thick, paste-like consistency.
4. Reinforce if needed: For larger or more intricate projects, reinforcing the cement with materials like wire mesh or rebar can add structural strength. Place the reinforcement within the mould, ensuring it is properly positioned.
5. Pour the cement: Carefully pour the mixed cement into the moulds. Use a trowel or spatula to spread and smooth the cement, ensuring it fills the mould evenly. You can also tap the mould gently to remove any air bubbles trapped within the mixture.
6. Shape and carve: While the cement is still wet but starting to harden, you can shape and carve the surface to add texture or refine the details of your artwork. Use various tools like spatulas, sculpting tools, or even your fingers to create the desired effect. 
7. Curing and drying: Allow the cement to cure and dry according to the instructions provided with your cement mix. This process can take several days or longer depending on the thickness of the cement and environmental conditions.
8. Finishing touches: Once the cement has fully cured, you can sand down rough edges or surfaces using sandpaper or a sanding block. Apply a sealant or waterproofing agent if desired to protect the artwork from moisture or weathering.
9. Display or use your cement art: Once you’re satisfied with the final result, display your cement art in your home, garden, or any other suitable location. Cement art can take many forms, from sculptures and decorative objects to planters, furniture, or even wall panels.
Remember to take necessary precautions when working with cement, such as wearing protective gear and following safety guidelines. Experiment with different techniques and enjoy the creative process as you explore the world of cement art.
Penkraft conducts classes, course, online courses, live courses, workshops, teachers’ training & online teachers’ training in Handwriting Improvement, Calligraphy, Abacus Maths, Vedic Maths, Phonics and various Craft & Artforms – Madhubani, Mandala, Warli, Gond, Lippan Art, Kalighat, Kalamkari, Pichwai, Cheriyal, Kerala Mural, Pattachitra, Tanjore Painting, One Stroke Painting, Decoupage, Image Transfer, Resin Art, Fluid Art, Alcohol Ink Art, Pop Art, Knife Painting, Scandinavian Art, Water Colors, Coffee Painting, Pencil Shading, Resin Art Advanced etc. at pan-India locations. With our mission to inspire, educate, empower & uplift people through our endeavours, we have trained & operationally supported (and continue to support) 1500+ home-makers to become Penkraft Certified Teachers? in various disciplines.