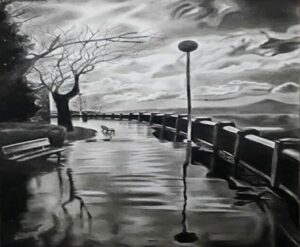
Pencil shading is the art of using pencils to create the illusion of three-dimensional form and texture on a two-dimensional surface. It involves using a range of tones and values to create depth and dimensionality, and can be used to create realistic drawings, sketches, and illustrations. Here are some steps for achieving realistic pencil shading:
1.Choose the right pencils: The type of pencil you use will affect the quality of your shading. For shading, you’ll need pencils with soft leads, such as a 2B, 4B, or 6B. These pencils will produce darker, richer tones than harder pencils.
2.Determine the light source: Before you start shading, it’s important to determine the direction of the light source. This will help you determine where the shadows and highlights will fall in your drawing.
3.Use a range of tones: To create the illusion of depth, you’ll need to use a range of tones from light to dark. Start by lightly sketching the basic shapes and outlines of your subject, then gradually build up the darker tones to create shadows and depth.
4.Use different pencil techniques: There are a variety of pencil techniques you can use to achieve different effects in your shading. These include hatching, cross-hatching, stippling, and blending. Experiment with different techniques to find the ones that work best for your drawing.
5.Pay attention to texture: When shading, it’s important to pay attention to the texture of the object you’re drawing. Smooth surfaces will require different shading techniques than rough or textured surfaces.
6.Blend carefully: Blending can help create smooth, subtle transitions between tones. However, it’s important to blend carefully so that you don’t lose the texture and detail of your drawing.
7.Use an eraser: Erasers can be used to create highlights and remove unwanted marks. Be careful not to erase too much, as this can damage the paper and make your shading look unnatural.

By following these steps, you can create realistic pencil shading that adds depth and dimensionality to your drawings. Remember to practice and experiment with different techniques to find the ones that work best for you.
Pencil shading is the technique of creating various values and tones using a pencil to create the illusion of depth and dimensionality in a drawing. Here are some steps to create a pencil shading in detail:
Remember, practice makes perfect when it comes to pencil shading. With time and patience, you can develop your skills and create stunning, realistic drawings
No matter what tool you choose to apply shade, it’s crucial to have complete control over the value that results. The good news is that mastering the medium only needs time and effort.
Draw a pyramid, cube, and a few more simple shapes for practise. They should be shaded to convey a single light source using the entire value spectrum. (Use contrast to draw analogies.)

Penkraft conducts classes, course, online courses, live courses, workshops, teachers’ training & online teachers’ training in Handwriting Improvement, Calligraphy, Abacus Maths, Vedic Maths, Phonics and various Craft & Artforms – Madhubani, Mandala, Warli, Gond, Lippan Art, Kalighat, Kalamkari, Pichwai, Cheriyal, Kerala Mural, Pattachitra, Tanjore Painting, One Stroke Painting, Decoupage, Image Transfer, Resin Art, Fluid Art, Alcohol Ink Art, Pop Art, Knife Painting, Scandinavian Art, Water Colors, Coffee Painting, Pencil Shading, Resin Art Advanced etc. at pan-India locations. With our mission to inspire, educate, empower & uplift people through our endeavours, we have trained & operationally supported (and continue to support) 1500+ home-makers to become Penkraft Certified Teachers? in various disciplines.

